Showing posts with label mercerized cotton thread. Show all posts

Thursday, June 13, 2019

African Flower Throw Pillow


http://bluboxoflove.blogspot.com


If there's one crochet motif that I really love the most. It's the African Flower Pattern. Hands down. I don't know why, I just fell in love with it. I've used this motif on many occasions just like this african flower bag and these key chains. The pattern is very versatile, you can make it bigger or smaller depending on your project. It's very easy too. ;)


Aren't the colors beautiful? It was inspired by a pinterest *post* which I pinned the very first time I saw it. The colors have a minimalist touch; very simple, clean and crisp looking, very different from the others which are usually too girly :p (btw I made one girly african flower throw pillow too).


http://bluboxoflove.blogspot.com


For the materials, I used No 8 Monaco Mercerized Cotton Thread (colors white, light blue and apple green) and no 5 IMIA steel hook. I've crocheted the squares individually first and joined them using single crochet row by row. If you've used joined as you go on your projects, I believe that is one better option too. Btw, the pillow measures roughly 12 inches on each four sides. I didn't crochet the back side, instead I attached a fabric and buttons for the openings. I can't seem to find the pattern I used however you may choose the pattern you like on this *link


I hope to finish more craft/crochet project this year and blog about it. I am not setting my expectation very high on that matter but I am hoping to be more productive this year. hehe. Till next time dears. Happy Crocheting and God Bless. 


Love, 
Jho


Follow us on:


Sunday, September 13, 2015

Monaco & Cannon Crochet Cotton 8


Have you tried to crochet using thread? Here in the Philippines long before crochet becomes a hit, our grandmothers used to crochet using Monaco and Cannon Crochet thread. Both are no 8 mercerized cotton thread which is perfect for almost everything! From blouses to shorts, bikinis to cover ups, doilies to bed covers and what not. Steel hook no 7, 5 & 2 are also perfect hooks for these threads.


Mercerization is a treatment for cellulosic materials, typically cotton threads, that strengthens them and gives them a lustrous appearance. -- From Wikipedia


Monaco and Cannon thread have wide range of colors from solid to multi and are colorfast too! I've used these threads couple of times on my projects which you can also find *here*.   I am so happy that until now I can still use the *coin purse*  I've crocheted years ago. This only proves that these threads are not only colorfast they are tough too which make this an ideal thread for your heirloom projects.  These threads are also very easy to use and it doesn't split which makes crocheting fun and faster.


Since I love these threads so much, I decided to open a small shop in* facebook*. If you are in the Philippines, you may  PM me for your orders and inquiries or maybe just chat about crochet. :)


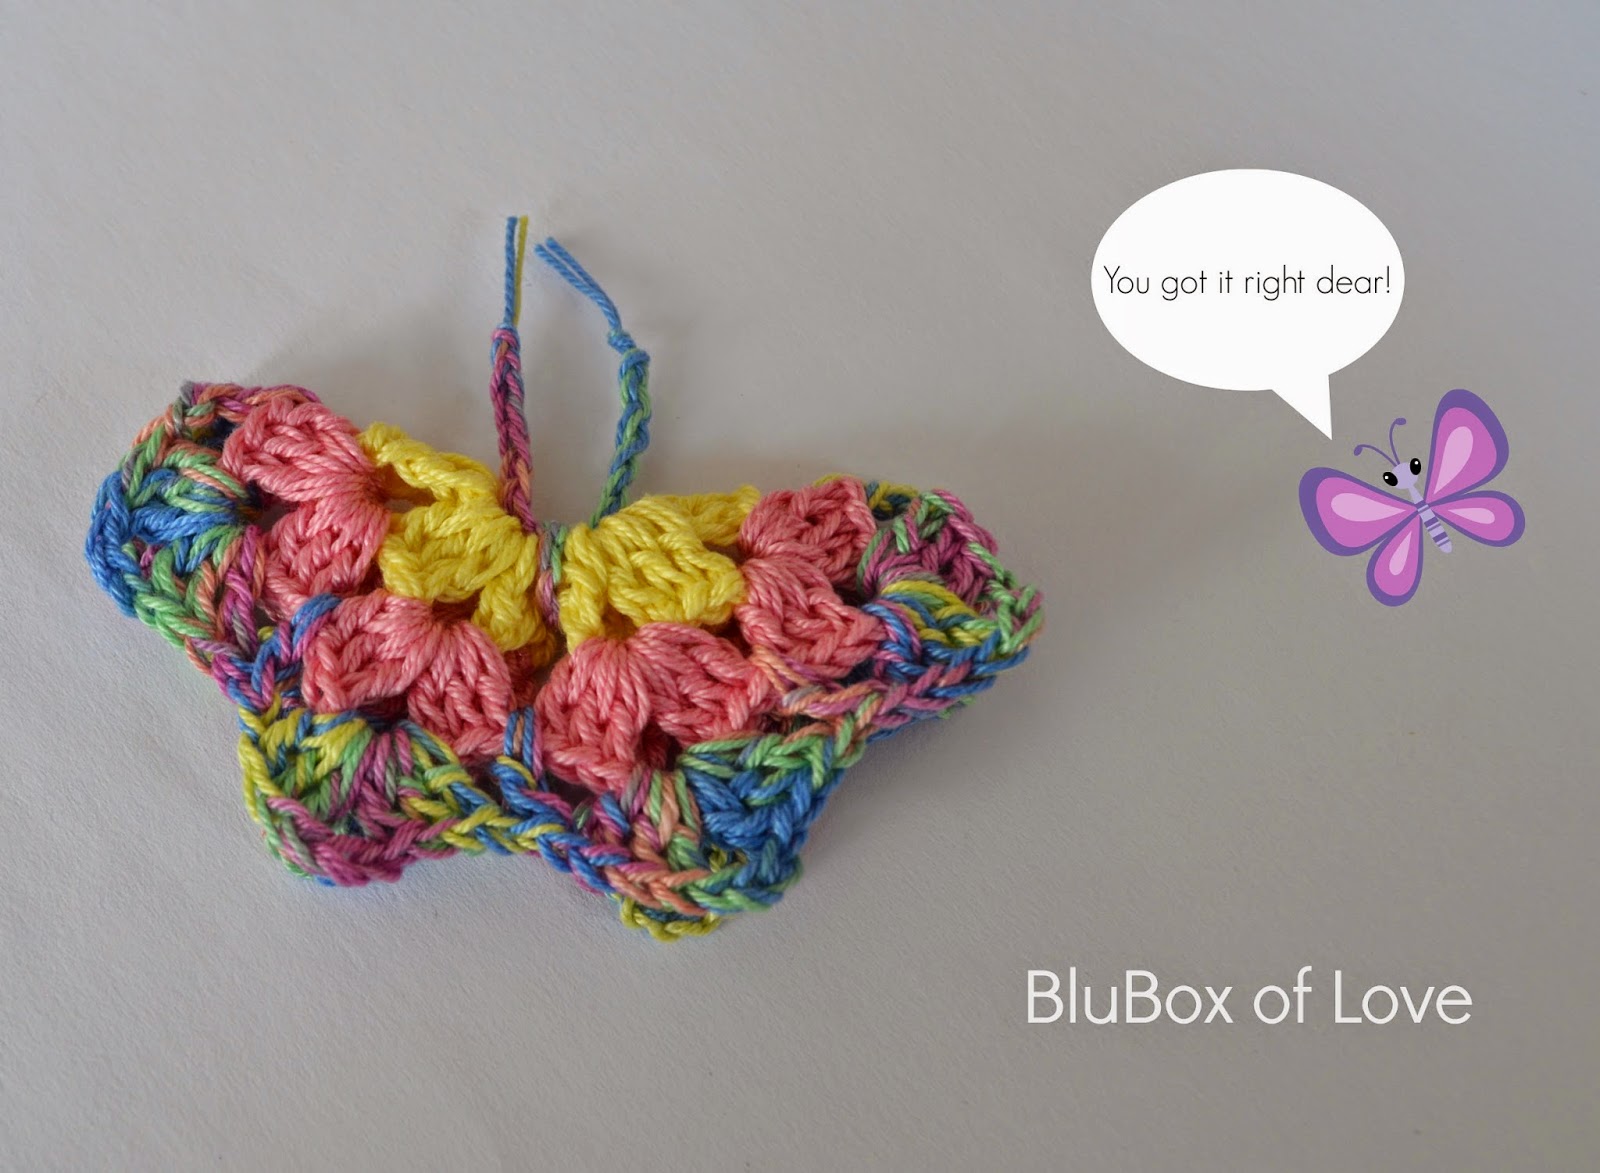
The Butterfly

The Star Flower

Neox tanktop made by talented Mimi Alelis


Thank you for dropping by and reading my post. Happy Crocheting & God bless!

Love, 
Jho


Friday, April 17, 2015

The Butterfly (Written Pattern)

Hello Dears! Thank you for sending me your warm regards and taking the time to follow my blog & fb posts. You just made me feel so special. :) For the past weeks, I've been getting requests to write a pattern for this cute creature. So I guess it's the right time.

http://bluboxoflove.blogspot.com

I've written them down below and added some pics as well. I hope you like them. If you have any question, please drop me a message on my facebook page and I'll be happy to help. By the way here's the link to the graph pattern.

Materials:
No 8 Monaco Mercerized Cotton Thread (175m)
Crochet steel hook no 2 or 1.95 mm
Magnets 1.5 cm (optional)

Special stitches:
Beginning Shell: (ch3, 2dc, ch3, 3dc)
Shell: (3dc, ch3, 3dc)

Few Simple Tips:
Use 2 strands of crochet thread throughout the rounds.
Cut yarn after each round
On each beginning round, I usually tie the new thread on the last ch3-space of the previous round

Steps:

R1: Chain 12, slip st in first ch

http://bluboxoflove.blogspot.com

R2: Ch3, 2dc, ch3, (3dc, ch3) x 2, (dc, ch3, dc, ch3), (3dc, ch3) x 3, (dc, ch3, dc, ch3), slip st on beginning ch3.

http://bluboxoflove.blogspot.com

R3: Beg Shell on ch3 sp, 3 Shells on next ch3 spaces, skip ch3 sp, 4 shells on next ch3 spaces, slip st on beg chain.

http://bluboxoflove.blogspot.com


http://bluboxoflove.blogspot.com

R4: Beg Shell on ch3 sp, [*(ch1, dc on 3rd st, ch1)*, Shell] x 7 rep*to*, slip st on beg chain 3.  

http://bluboxoflove.blogspot.com


Fold the motif in half (follow the broken line on the pic). 

http://bluboxoflove.blogspot.com

For the Antenna: Using the color used on the last round, ch 20 with 2 strands held together. Tie the end of last chain. The excess thread on both ends is about half an inch. You may want to add magnets to help them stick on magnetic surface aka refrigerator. :)
I only used Elmer's All purpose glue, wait for it to settle a bit then put them on both wings. 

http://bluboxoflove.blogspot.com

http://bluboxoflove.blogspot.com
That's our ref with our water bill. hehe


Happy Crocheting & God bless! 

Love,
Jho

Tuesday, July 22, 2014

The Butterfly

Hi Dears! This post is related to the Star Flower I made early on. Since I will be using flowers, I thought butterflies are good addition too! Sorry if I took almost 2 weeks to blog about this. But I'm pretty sure you'll love it. :)


This pattern is not mine 'originally'. The butterfly was a give away on the Christening of a friend's Baby boy. It was an AHA! moment for me when I first laid my eyes on it. Back then, I was fond of crocheting purses and when I saw the crocheted butterfly I was really amazed by how it was done. From there, I studied how it was made that's where I got the butterfly pattern. By the way the giveaway had magnets on both wings so that it can be put on a refrigerator as a decoration. (sorry I forgot to take the picture)

I taught of making a written pattern but along the way I realized that it was harder than making a diagram.:) Let's start!

Materials:

No 8 Mercerized Cotton Thread (2 strands held together throughout)
2mm

Size:
2.5 in (approx)

Diagram: 


Butterfly Pattern


Photo Tutorial:


Phototutorial round 1

Phototutorial round 2

Phototutorial round 4

Phototutorial round 4

Sorry dears, I missed to take the photo of the butterfly transformation from a flower. But anyway's you can easily follow through without it. For the Antenna, just chain 20 then cut leaving both ends with half an in each. Fold the flower (wrong side facing each other), where the 3 ch space is parallel to each other. Insert the antenna on top of the 3 ch spaces and tie it. Yep, that's it!

Phototutorial round 5
Arrow pointing the 3 ch spaces.

Phototutorial round 6
Close up look of the butterfly

I always thought that butterfly was once a caterpillar, but I was wrong. Crochet taught me that butterfly was once a flower. :) You want proof? just scroll down. 


Flowers

The Butterfly Transformation

The Butterfly Transformation

The Butterfly Transformation Final Stage
Flowers turned to Butterflies

I hope you love it as much as I do. :) (Update: Want to see them in action? I've use them as decor on this cot mobile I made. Come check it out.)

Thank you dears for all your support. I wish you all the best. You can follow me on Facebook as well. Feel free to post your finish projects there. I would really love to see yours. And as always, God Bless and Happy Crocheting!

Love,
Jho


 ♡ ♡ ♡
©2013-2014 BluBox of Love. All Rigts Reserved


Wednesday, July 9, 2014

The Star Flower

I had this Star flower for few months now. And back then I didn't know that I'll later call her a 'Star Flower'. (If you noticed she is very similar to the African Flower keychains I made, except this one has 5 petals) (I was very tired then, so I didn't notice that I made a Star Flower instead of African flower) And so she was neglected and alone on a small box. Then I decided to placed her in a jar along with some of the scrap threads and yarns from projects last year. And just recently, I fell in love with her simplicity and beauty..

Star Flower Garden

A friend asked me if I can make something that he can place at the top of his baby's crib. And I think these Star Flowers are the answer. :) 

✿✿✿
I used double strand of No 8 Mercerized Cotton Thread through out the pattern, you can substitute it with any yarn you have on hand. And for the hook I used Susan Bates 3.25 mm, you can also substitute this with other size depending on the yarn/thread you will be using. And btw, the size of the finished flower is approximately 2 1/2 in. 


To start, make a magic circle, Ch 2, double crochet, ch 1, (*2 double crochet, ch 1*) x 4 slip st on ch 2. 

2nd Round. Slip st on ch 1 sp, (ch 2, dc, ch 2, 2 dc) on ch 1 sp, *(2dc, ch 2, 2 dc on next ch 1 sp)* x 4, slip st on beginning 2 chains

Onto round 3. Ch 1, 7 dc on ch 2 sp, sc on 3rd dc, *(7dc on ch 2 sp, sc on 3rd dc)* x 4, sl st on beg ch 1.
And your done! :) 

✿✿✿


Box of Star Flowers

Star Flowers

I believe, these star flowers are also perfect as buntings. It'll be sure to brighten anyone's place. :) How about you? What are you going to make of these flowers? I would love to see what you have come up to. Be sure let me know, okay?

God Bless and Happy Crocheting!

Love,
Jho

✿✿✿

Follow on Bloglovin

Thursday, July 3, 2014

Choco Strawberry Cake Trinket Tutorial

Choco Strawberry

Size: 2 in x 2.5 in (approx)

Materials Used:

 Bottom
   Worsted Weight Yarn
   3.75 mm hook
   Blunt Needle
  
 Toppings
   8 ply Local Cotton Yarn
   3.25 mm hook
   Ruffles/Rose (No 8 Mercerized Cotton Thread & No 7 IMIA steel hook or 1.65mm)

Optional: Mini Jar

Steps:
 This is for the bottom part of the cake.
 Start with Magic Ring
 R1. Ch2, 9 dc (10), sl st on ch2
 R2. Ch2, dc on same st, 2 dc on next st around (20), sl st on ch2
 R3. Ch2, turn 2 dc on next st, *dc, 2 dc on next st around* (30), sl st on ch2 (we are now going to work around the circle) 
 R4. Ch2, FPDc on same st, dc on next st, *FPDc on next st, dc on next st* around (30), sl st on ch2
 R5 - R7. Repeat R4. Fasten off. 


  For the Toppings:
  • Foundation Circle - The color gold circle represents the loop. This is where you will make the ruffles. 


  • Rose


  • Ruffles


For more pictures and additional info, please refer on this link. I wish you all nothing but the best. :) Happy Crocheting and God Bless!!


Love,
Jho


                                                     Follow on Bloglovin

Saturday, June 7, 2014

Simple Crocheted Necklace


Simple Crocheted Necklace - front view


Hello! I know you are very excited about this simple crocheted necklace I mention on my blog post here. I really enjoyed making this one. I was surprised about the outcome, I thought at first that I still need to blocked it but the outcome is just the way I like it. 

Related Posts Plugin for WordPress, Blogger...